Showing posts with label Kids. Show all posts

Monday, August 1, 2011

Haircuts

I don’t have any training as a hairdresser other than cutting my husbands hair for the past 10 years and once in a while cutting the kids’ hair. Still both my dad and my kids either needed or wanted a haircut and since we are so far away from any hairdresser I got the job of doing it. All you need is a very good pair of haircutting scissors.

IMG_8352IMG_8353IMG_8354IMG_8355

Isabel wanted to have her hair cut short and I got the job.

IMG_8358IMG_8359

Sofie needed to see and got her bangs cut.

Monday, July 25, 2011

Haircuts

My dad went home to my home town to pick up some supply and to get a haircut. Unfortunately for him all the hairdressers but one had vacation and the one left was booked up. Lucky for him my mom new where my old hairdresser kit was and brought it back to me.

Mind you I have never had any training as a hairdresser, nor have I ever worked as a hairdresser. My only training is the fact that I have cut my husbands hair since we got married 10 years ago and also my dads, my cousins, my kids and my own hair on and off too the past 7 years.

I didn’t get any pictures of my dad, but I did get before and after pictures of my kids.

IMG_8351IMG_8352

Isabel who has been growing out her hair since she was two and for 5 years has refused to see a hairdresser more than once a year decided to let the locks go.

IMG_8353IMG_8354IMG_8355IMG_8356

It is a little uneven, but not too shabby and the girl is so happy.

IMG_8357IMG_8358

Sofie has been so hard to get to sit still that I decided to save her bangs and get them long, but now she refuses to have me pull them away from her face using clips or ties and it was time for the cut again.

IMG_8359

Look at that pretty little face. Haircuts not so fun though.

Tuesday, July 12, 2011

Living free

IMG_7814

The kids are thriving here in Norway. Isabel is able to go outside whenever she wants to as long as she tells us where she is headed and stays somewhat within sight.

It is quite different from where we live in the US. Isabel is sometimes out by herself there too, but I always have to keep an eye on her and she has to stay right outside the door. She hates the restrictions of being outside there with no space at all and not being able to go out whenever she wants to.

IMG_7852

Here she is out and about all the time. As soon as grandpa is out the door, she is right behind him. They work in the barn on wood work projects, she helps him bring in firewood, they work on laying rocks down for the new patio, they go fishing together, or they go to the river to get potatoes for grandma.

Some days she will run down to the beach to look for crabs and sea shells, other days she will run around the garden with Sofie, other times she will run to what she calls troll valley to say hi to our trolls which by the way are just some very big rocks that I was convinced had to be trolls when I was a child.

Of course she is missing having someone to play with outside, but spending so much time by herself here is good for her and her imagination.

Sofie is enjoying the freedom to play outside as well. Running out one door and in the other, around and around the house. She has had a few accidents so far as the property is on a hill and running can then turn into a tumble into a flowerbed.

It is good not having to think about any sex offenders in the neighborhood. It is good not having to fear any kidnappings. It is good not having to fear that my kids will venture out into the parking lot or the street and get hit by a car. It is good to let them live free.

Saturday, July 9, 2011

What can I do?

IMG_7692

“What can I do?” is a question I hear quite often both at home in the US and here in Norway. Back in the US I try to come up with an activity for her or we end up going to the play area at a park or at the mall. Being that we are on vacation in a place where there is absolutely no other kids except your 5 year older/younger sister and it takes 20 minutes by boat just to get to civilization you are on your own trying to entertain yourself.

“Can I go outside and play” is another question that I hear a lot and back in the US I have to tell her no and here all I have to say is stay off the big rocks and the seagulls nest and please do tell me where you  are headed.

One day there were just to many mosquitos outside to be able to go outside to play and Isabel was getting restless. She’s got plenty to do here too, but sometimes she does need a reminder. On the dining room table there is a pile of reading books, writing books, math books, science books and drawing books. Upstairs there is a playroom just for her with Barbie’s and other little toys that Sofie shouldn’t get her hands on. The reminder; “Here is a list of chores you can do if you don’t have anything to do”. I didn’t see her until bedtime.

I love the freedom the kids can have here, running around the house, playing outside and inside. Using their creativity and imagination to play and entertain themselves.

As for the TV… as far as the kids know there is only children’s programs on for about 40 minutes every evening and I prefer it that way. Let us keep it to ourselves that there is a whole children’s channel showing kids shows all day.

Thursday, June 23, 2011

More crayon / marker rolls

The kids and I really love the crayon roll I made earlier. It was so practical and made it so easy to keep tabs on how many crayons we had at any time.

Then for the kid’s birthday they got a lot of markers, both Crayola Color Wonder and Rose Art markers. And that made me think, “What if I made rolls for the markers as well.

IMG_7639

The smallest one is actually made to fit the crayons, but shortened to only fit 10. Obviously it got to small, but it still works. I was wondering what I could do to make the one to fit the bigger markers when it hit me.

So using {The Pleated Poppy}’s tutorial with the measurements to fit crayons I did a little math. Her measurements are 15 1/2 by 5 with the crayons being thin and only about 3 inches long. I thought that if I added 2 inches to however long my markers were and since you can actually fit 2 crayons into one 1 inch pocket, I could take or add 1/4 inch to the pockets depending on the thickness of the markers.

For the Crayola Magic Markers who are 5 1/2 inches long and somewhat thick my measurements were 7 1/2 by 15 1/2. The pocket were made at 1 1/4 inch increments and I were able to fit all 11 markers and two pencils.

I also found out that I could not start in the middle putting the lines for the pocket in. Instead I started my first line at 1/4 inch from the edge.

For the other markers I had to make two rolls since there were over 50 of them. They are a little longer and thinner. I made the pockets only 3/4 inch wide to accommodate as many markers as I could.

I absolutely love these rolls and I am planning on making more of these as gifts for my cousins kids for Christmas this year.

Monday, June 20, 2011

Felt activity kit

I made a few more items for the kids to play with while travelling. Kristi over at {Extraordinary Moments in an Ordinary Life} made these Felt Play sets for an upcoming road trip. I didn’t make mine exactly like hers, but kept to the same idea and I only made two as there is only so much we can take with us on the plane.

IMG_7632

One desert type landscape for their dinosaurs. I was going to put in a volcano there just like Kristi, but I didn’t have red or orange felt.

IMG_7633

Then I made a barn setting for their farm animals.

Isabel is very excited to play with these and I hope Sofie will like them too.

I just love the fact that they have carrying handles and that I can put the toys inside them when they are not in use. It was such a fun and easy little project to do and I actually managed to make a good dent in my felt stash.

Wednesday, June 8, 2011

Toys to travel with

Fellow moms, you probably understand when I say that I am almost in panic mode right now thinking about our trip that is coming up in no time. I am travelling my myself with my two girls all the way from Seattle to Bodø, Norway. That is three flights. That might make one very grumpy 2 year old and one frazzled momma. The 7 year old who is used to this travelling will have to be a very good helper and manage as best as she can on her own.

To survive this trip I figured it would be good to have some new toys with us that will keep them both occupied and happy. Bonus would be if it they are small and lightweight. A while back I found the “I Spy Bag” at Blue Cricket Design by Oopsey Daisy.

I made a few changes to mine. I used curtain insulation fabric inner and a thicker home décor fabric outer. I also just made a easy square. Inside I used a few smaller toys and the insides of a lumbar pillow I found in the dollar bins at Target. That might have been a mistake as it clings to the toys and the window making it near impossible to spy anything in the bag. At least it doesn’t weight anything like it did when I filled it with rice on my first try. I might have to go out and actually buy the Poly Pellets instead.

IMG_7467IMG_7469IMG_7470

Later I made a crayon roll using the tutorial made by The Pleated Poppy. I made one change here too. I decided to use some jeans fabric I had left from a project last year and because it is thick I figured I didn’t need any extra fabric for any stability. It worked out perfectly and it was so easy to make.

IMG_7473IMG_7474

These two will have a spot in my carry on. Now I just have to start packing so I don’t end up with to much stuff for my girls to bring.

Linking up with

Saturday, June 4, 2011

Pictures of the week

Taking care of the garden.

By the way do anyone have any good tips on how to get rid of Aphids on my plants?

IMG_7215  IMG_7218    IMG_7228    

Playing with little sisters Duplo.

Isabel is so hard to get pictures of as she will run and hide when she sees the camera, but here she was to occupied to notice me.

IMG_7238

Reflections.

 IMG_7251

Feeding ducks with friends.

IMG_7253 IMG_7255

A moment of quietness.

IMG_7258

Thursday, June 2, 2011

Felt head bands and Felt crowns

IMG_7379IMG_7385

Isabel wanted her and Sofie to have crowns for their birthdays this year. And since I had some felt left over from previous projects I figured I would use it to make them some crowns that might last them a while.

Template for crowns were found at First Palette Your step by step guide to kids crafts. Other than the felt and the template I used my trusty glue gun and some beads I had from a snowflake project.

IMG_7356

I folded the felt so it doubled to give it more strength and stability and used the template to draw the crown on the felt, then I used the scissors to cut it out.

IMG_7357

I used the glue gun to glue it all together. The glue from the glue gun also add some extra stability to the felt.
IMG_7358  

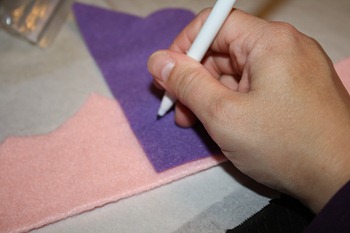
I drew by hand the numbers and letters for the crowns. Isabel wanted to have her name on hers. I decided to not do that to Sofie’s crown.

IMG_7363

Then I glued some beads around the points to add more visual interest and the bling the kids enjoy so much.

IMG_7364

I found that the crowns needed a little bit extra stability on the front and used some more felt that I doubled up with the use of my glue gun.

IMG_7365 IMG_7366

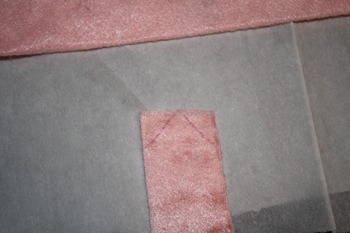
I made sure it would fit and cut out the shape of the head point on it.
IMG_7367

Then I glued it on on the back of the head of the crown.

 IMG_7370 IMG_7371

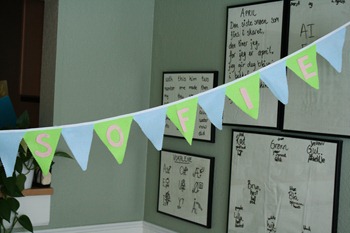
I also wanted to make a banner for the girls and what else would I use but my ever trusted felt.

IMG_7372

I drew the letters by hand on the felt and cut it out.

 IMG_7374

Then I glued the triangles onto some ribbon that I had on hand.
IMG_7375 IMG_7377  

Because I only used supply I had on hand from other projects I spend absolutely nothing on this. Now I just have a bag of felt left that I am giving away if I can only find someone who wants it.